처음 안드로이드 스튜디오를 설치하고 스마트폰 앱을 개발하는 경우 대부분 AVD 가상 장치를 이용하여로 테스트를 진행 하는데 어느정도 완성이 되면 실제 핸드폰을 이용하여 테스트를 해야 합니다.  이때 핸드폰을 개발자 모드로 설정 하였지만 컴퓨터에 연결을 해도 Android Studio에서 인식을 하지 못하여 테스트를 할 수 없는 상황을 격게 됩니다.  물론 어떤 기종의 스마트폰은 USB로 연결 하자 마자 쉽게 인식이 되는 경우도 있고 어떤 기종은 계속 오류가(오류라기 보다는 연결이 안됨) 발생 합니다.


위의 그림은 스마트폰을 USB로 연결하여도 디바이스를 찾지 못하고 가상 디바이스만 나타나는 현상 입니다.  이런 경우는 컴퓨터 운영체제 버전이 낮거나 업데이트가 안되어 스마트폰 드라이버를 지원하지 못하여 발생하는 경우가 많습니다스마트폰용 USB 드라이버가 설치되지 않아서 인식을 못하는 상황이 발생한 것입니다.


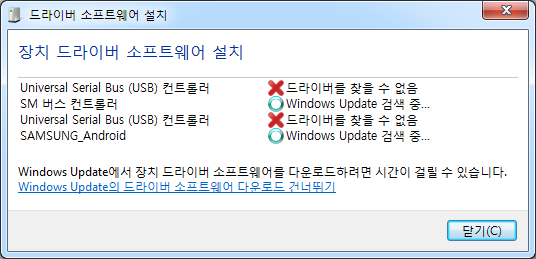
확인을 하려면 스마트폰을 USB로 연결하고 [드라이버 소프트웨어 설치] 창을 열어보면 오래된 운영체제 또는 업데이트가 안된 경우 드라이버를 찾지 못하여 계속 찾기를 반복만 하고 있습니다.


이 글에서는 제가 사용하고 있는 삼성폰으로 설명을 진행 하지만 다른 제조 회사 제품도 동일한 현상이 발생하면 아래의 방법으로 해결을 하면 되는데 인식이 안되는 스마트폰은 제조사 마다 USB 드라이버를 제공하고 있으니 제조사 홈페이지에 들어가 통합 드라이버를 다운받아 설치를 진행 하면 간단히 해결 할 수 있습니다.


삼성 스마트폰 드라이버 다운로드 사이트 접속 주소 입니다.(각 제조사별로 작업합니다.)

https://developer.samsung.com/mobile/android-usb-driver.html


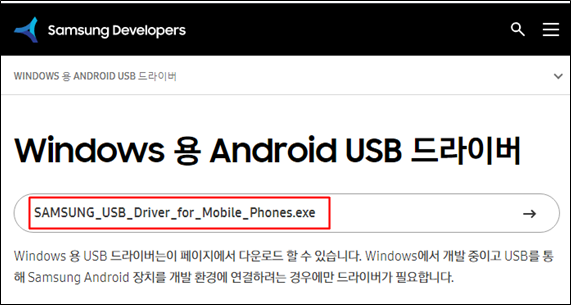
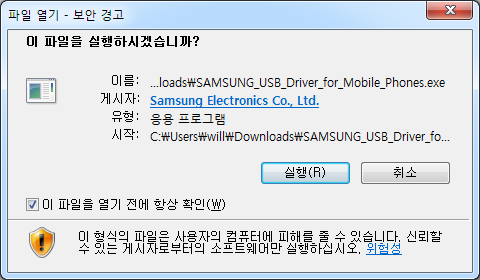
SAMSUNG_USB_Driver_for_Mobile_Phones.exe 를 클릭 하면 드라이버 다운로드가 바로 진행되고 완료 되면 실행 하여 드라이버 설치를 진행 합니다.  설치 작업은 대부분 기본 설정된 버튼을 클릭 하면 됩니다.


여기 까지는 설치를 위한 설정 진행입니다.


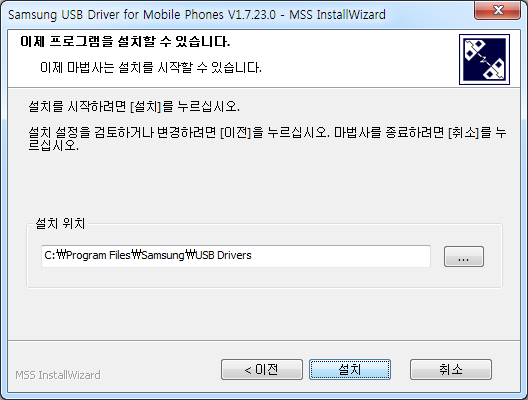
이제 [설치] 버튼을 클릭 하면 드라이버 설치가 진행 됩니다.
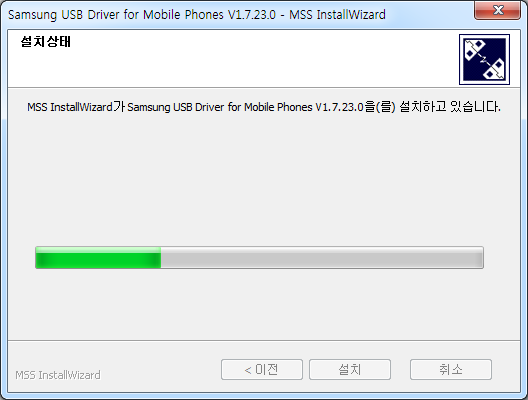


설치가 진행 되고


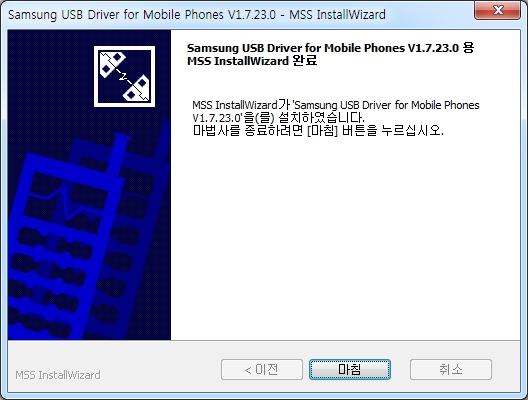
설치가 완료되면 [마침] 버튼을 클릭 하여 종료 합니다.  경우에 따라 바로 장치를 인식하는 경우도 있고 컴퓨터를 재시작 해야 스마트폰을 인식하는 경우도 있습니다.  저는 Windows 7인데 다시 시작을 해야 인식이 되었습니다.  윈도우 창 우측에서 [드리이버 소프트웨어 설치] 창을 열어보면


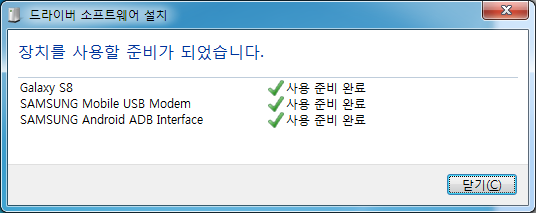
계속 찾기로 빙빙 돌던 아이콘이 체크로 변하고 상태도 [사용 준비 완료]로 변경 되어 있고 스마트폰을 사용할 수 있는 상태가 된 것 입니다.


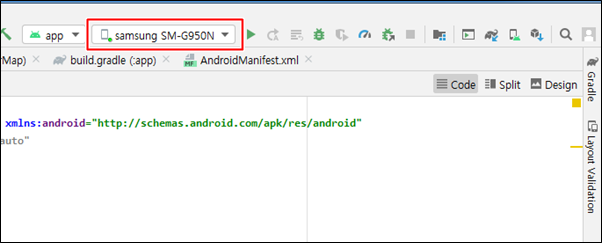
안드로이드 스튜디오를 열어보면 데스트 디바이스가 가상 디바이스에서 연결된 실제 스마트폰으로 변경된 것을 확인 할 수 있습니다.

이제부터는 상황에 따라 가상 디바이스 또는 실제 스마트폰을 선택하여 테스트할 수 있는 환경이 마련 되었습니다.


- copy coding -


안드로이드 스튜디오에서 제공하는 배경 테마는 기본적으로 Darcula, High contrast, IntelliJ 이렇게 3개를 제공하고 있습니다좀더 화려한 배경 테마를 사용하고 싶은 생각이 든다면 플러그인을 다운로드 받아서 적용을 하면 아주 다양한 환경을 구성할 수 있습니다.

테마 플러그인은 상당히 많은데 여기서는 한가지 플러그인을 설치해서 사용하는 방법을 알아봅니다다른 플러그인도 동일한 방법으로 사용하면 됩니다일단 어떤 플러그인들이 있는지 확인을 하기 위해 검색을 해야 합니다.


메뉴에서


File > Settings...

를 클릭 하여


android studio theme plugin


Settings 팝업 창을 오픈 합니다.

좌측 메뉴에서 Plugins를 선택 합니다.

못찾겠다면 위에 검색창에 Plugin을 입력해서 메뉴를 찾습니다.


android studio theme plugin


이제는 중간 검색 창에 키워드로 theme를 입력 하면 수많은 테마 플러그인이 나오는데 어떻게 생긴건지는 하나씩 클릭하면 우측에 설명과 샘플 화면 screenshot을 볼 수 있거나 화면이 없다면 플러그인 홈페이지가 링크되어 있으니 찾아 가서 확인할 수 있습니다.

구경이 끝나면 적당한 테마를 선택하고 우측 상단 install 버튼을 클릭해서 설치 합니다제일 많이 설치 하는 Material Theme UI를 선택해서 install 버튼을 클릭해 보았습니다.


android studio theme plugin


외부 플러그인 사용에 대한 위험성을 알리는 창이 나오는데 Accept 버튼을 클릭하면 설치가 진행 됩니다잠시 후 설치가 완료 되면


android studio theme plugin


Install 버튼이 Restart IDE 버튼으로 변해 있는데 클릭 해서 안드로이드 스튜디오를 재시작 합니다.


android studio theme plugin


재시작이 되고 첫 화면이 나옵니다어떤 테마가 설치 되었는지 알려주는 군요.


안드로이드 스튜디오를 시작하고 다시 Settings 을 열고 보면 이번에는

Appearance & Behavior > Material Theme 가 추가 된걸 볼 수 있습니다. 클릭을 하고 Selected Theme 우측에 보면 현재 설치된 테마를 볼 수 있고 클릭을 하면


android studio theme plugin


테마의 상세 선택이 가능 합니다테마를 하나 설치하면 하나 또는 여러 개의 부가적인 테마들이 같이 설치가 됩니다.


한번 몇개 감상해 볼까요?


Material Oceanic


android studio theme plugin


Material Darker


android studio theme plugin


Material Lighter


android studio theme plugin


Dracula


android studio theme plugin


Atom One Light


android studio theme plugin


등등 17개의 테마로 변경이 가능 합니다.


만약 Material Theme UI 플러그인에 마음에 맞는게 없다면 처음 테마 플러그인을 검색하던 Settings... 팝업 화면으로 돌아가 다른 테마를 설치해서 하나씩 테스트 해보면서 찾으면 됩니다.


- copy coding -


안드로이드 프로그램에서 제일 많이 사용하게 되는 View 인터페이스 TextView EditText 이용하여 엔터키 이벤트 사용 방법을 알아 봅니다

엔터키 이벤트는 EditText에서 발생 하는데 여러가지 key event 들이 발생 하면 그중 enter event 선택하여 처리를 하는 것으로 2가지 방법을 이용하게 됩니다. 하나는 EditText 생성시 직접 이벤트 처리를 부여하는 방법이고 다른 하나는 implements 사용하여 OnKeyListener 상속받아 처리하는 방법 입니다최종 구현 상태는 아래 그림과 같습니다.


android enter key


1. 프로젝트 생성


실제로 프로젝트를 생성해 보도록 하겠습니다.


android enter key


Empty Activity 선택 하고


android enter key


적당한 프로젝트 명을 입력 합니다신규로 추가하는 프로그램 없이 프로젝트 생성시 기본적으로 생성되는 파일을 이용하여 구현합니다.


2. Layout 구현


먼저 activity_main.xml파일에 EditText 2 추가해 줍니다. id 적당히 입력을 해주면 됩니다하나는 생성할때 이벤트 처리 기능을 부여 하고 다른 하나는 OnKeyListener 이용한 처리에 사용하게 됩니다.

<TextView

        android:id="@+id/plain_text"

        android:layout_width="wrap_content"

        android:layout_height="wrap_content"

        android:text="hello world"

        app:layout_constraintBottom_toBottomOf="parent"

        app:layout_constraintLeft_toLeftOf="parent"

        app:layout_constraintRight_toRightOf="parent"

        app:layout_constraintTop_toTopOf="parent" />


    <EditText

        android:id="@+id/plain_text_input"

        android:layout_width="match_parent"

        android:layout_height="wrap_content"

        android:layout_marginTop="112dp"

        android:hint="text1"

        android:inputType="text"

        app:layout_constraintTop_toTopOf="parent"

        tools:layout_editor_absoluteX="27dp" />


    <EditText

        android:id="@+id/plain_text_input2"

        android:layout_width="match_parent"

        android:layout_height="wrap_content"

        android:layout_marginTop="168dp"

        android:hint="text2"

        android:inputType="text"

        app:layout_constraintTop_toTopOf="parent"

        tools:layout_editor_absoluteX="0dp" />


3. Java 기능 구현


MainActivity.java 에서 이벤트 처리 로직입니다.


3.1 첫번째 이벤트 처리 방법


첫번째는 onCreate()에서 EditText 생성할 엔터 이벤트 처리 로직을 부여하는 방법 입니다. EditText 생성 하고 바로 onKey() 기능을 추가하여  필요한 작업을 구현하면 됩니다.

@Override

    protected void onCreate(Bundle savedInstanceState) {

eText2 = (EditText) findViewById(R.id.plain_text_input2);


eText2.setOnKeyListener(new View.OnKeyListener() {

            @Override

            public boolean onKey(View v, int keyCode, KeyEvent event) {

                switch (keyCode) {

                    case KeyEvent.KEYCODE_ENTER:

                        txtView.setText(eText2.getText());

                        break;

                }

                return true;

            }

        });

}


구현된 작업은 EditText 입력한 내용을 TextView 출력 하게 하는 간단한 작업 입니다.


3.2 두번째 이벤트 처리 방법


두번째는 OnKeyListener 상속받아 onKey() 구현하는 방법 입니다. class implements OnKeyListener 상속하고 Override onKey() 구현을 하면 됩니다.

public class MainActivity extends AppCompatActivity implements View.OnKeyListener {


@Override

protected void onCreate(Bundle savedInstanceState) {

eText1 = (EditText) findViewById(R.id.plain_text_input);

    eText2 = (EditText) findViewById(R.id.plain_text_input2);

}


@Override

public boolean onKey(View v, int keyCode, KeyEvent event) {

         if(keyCode == KeyEvent.KEYCODE_ENTER) {

            switch (v.getId()) {

                case R.id.plain_text_input:

                    txtView.setText(eText1.getText());

                    break;

                case R.id.plain_text_input2:

                    txtView.setText(eText2.getText());

                    break;

            }

            return true;

        }

        return false;

}


구현된 내용은 EditText에서 이벤트를 받으면 엔터 이벤인가 확인 하고 2개의 EditText 어디에서 발생 하였는지 확인하여 입력한 내용을 TextView 출력 하게 하는 작업 입니다.


android enter key

위에 있는 결과는 두번째 EditText에서 엔터키 이벤트가 발생한것을 있습니다.


4. 전체 Source


4.1 activity_main.xml


<?xml version="1.0" encoding="utf-8"?>
<androidx.constraintlayout.widget.ConstraintLayout
xmlns:android="http://schemas.android.com/apk/res/android"
   
xmlns:app="http://schemas.android.com/apk/res-auto"
   
xmlns:tools="http://schemas.android.com/tools"
   
android:layout_width="match_parent"
   
android:layout_height="match_parent"
   
tools:context=".MainActivity">

    <TextView
       
android:id="@+id/plain_text"
       
android:layout_width="wrap_content"
       
android:layout_height="wrap_content"
       
android:text="hello world"
       
app:layout_constraintBottom_toBottomOf="parent"
       
app:layout_constraintLeft_toLeftOf="parent"
       
app:layout_constraintRight_toRightOf="parent"
       
app:layout_constraintTop_toTopOf="parent" />

    <EditText
       
android:id="@+id/plain_text_input"
       
android:layout_width="match_parent"
       
android:layout_height="wrap_content"
       
android:layout_marginTop="112dp"
       
android:hint="text1"
       
android:inputType="text"
       
app:layout_constraintTop_toTopOf="parent"
       
tools:layout_editor_absoluteX="27dp" />

    <EditText
       
android:id="@+id/plain_text_input2"
       
android:layout_width="match_parent"
       
android:layout_height="wrap_content"
       
android:layout_marginTop="168dp"
       
android:hint="text2"
       
android:inputType="text"
       
app:layout_constraintTop_toTopOf="parent"
       
tools:layout_editor_absoluteX="0dp" />

</androidx.constraintlayout.widget.ConstraintLayout>


4.2MainAcitivity.java


두가지 기능을 한곳에 담아 보았습니다.

package copycoding.tistory.texttest;

import
androidx.appcompat.app.AppCompatActivity;

import
android.os.Bundle;
import
android.view.KeyEvent;
import
android.view.View;
import
android.widget.EditText;
import
android.widget.TextView;

public class
MainActivity extends AppCompatActivity implements View.OnKeyListener {
    EditText
eText1, eText2;
   
TextView txtView;
   
@Override
   
protected void onCreate(Bundle savedInstanceState) {
       
super.onCreate(savedInstanceState);
       
setContentView(R.layout.activity_main);

       
eText1 = (EditText) findViewById(R.id.plain_text_input);
       
eText2 = (EditText) findViewById(R.id.plain_text_input2);
       
txtView = (TextView) findViewById(R.id.plain_text);
       
eText1.setOnKeyListener(this);
       
eText2.setOnKeyListener(new View.OnKeyListener() {
           
@Override
           
public boolean onKey(View v, int keyCode, KeyEvent event) {
               
switch (keyCode) {
                   
case KeyEvent.KEYCODE_ENTER:
                       
txtView.setText(eText2.getText());
                        break;
               
}
               
return true;
           
}
        })
;
   
}

   
@Override
   
public boolean onKey(View v, int keyCode, KeyEvent event) {
        
if(keyCode == KeyEvent.KEYCODE_ENTER) {
           
switch (v.getId()) {
               
case R.id.plain_text_input:
                   
txtView.setText(eText1.getText());
                    break;
//                case R.id.plain_text_input2:
//                    txtView.setText(eText2.getText());
//                    break;
           
}
           
return true;
       
}
       
return false;
   
}
}


- copy coding - 


안드로이드 스튜디오를 처음 설치할 때 배경에 대한 테마를 선택하도록 되어 있습니다하얀 바탕과 검은 바탕 중 어떤걸 선택 할지 조금 고민을 하게 되는데 대부분 기본으로 설정되어 있는 검은 색의 Darcula를 선택하고 넘어 갑니다.

그런데 코딩을 하다 보면 환경에 따라 또는 기호에 따라 하얀색 바탕이 편할 때도 있습니다개인적으로는 낮에는 검은 배경, 밤에는 하얀색 배경이 글씨를 보는데 눈의 피로를 덜 하게 되는 것 같습니다. 현재는 Darcula로 설정이 되어 있습니다.


android theme


테마 설정 변경은 간단합니다메뉴에서


 File > Settings...


를 선택 하면 


android theme


Settings 팝업 창이 나타나고


android theme


좌측 메뉴에서


Appearance & Behavior > Appearance


를 찾아서 클릭 합니다. 이제 우측 첫 번째 항목에

Theme:를 확장해 주면 Darcula, High contrast, IntelliJ 중 하나를 선택 할 수 있습니다.


먼저 High contrast를 선택하고 하단에 있는 OK 버튼을 클릭해 봅니다.


android theme


밋밋하던 개발 환경이 조금 강렬해 졌습니다. 대신 눈은 피곤해질것 같네요.


다시 Settings 창을 열고


android theme


이번에는 IntelliJ 를 선택 하고 OK 버튼을 클릭 합니다.


android theme


흰색 바탕의 편집 모드로 변경이 되었습니다

각자 눈의 피로가 덜 할 수 있는 테마를 골라서 사용해 보세요.


- copy coding -


1234

+ Recent posts